Create a Website
Friday, 7 July 2017
Today we will set up a testing workflow and learn how to create branches for adding and changing features on our sites. We will use this to change the visual style the site and create blog posts.
This session will be mostly hands-on.
Set up testing environment
Testing and checking your work is a necessary part of doing any task. You don't send a paper off to your professor without proofreading it (you shouldn't, anyway). Similarly, you do not want to put a website online that you haven't tested.
All we need to do destroy the first container we created (don't worry, it's just a virtual machine) and then create a new container using the Ruby stack.{sidenote 'installjekyll' '"Running Jekyll on Codeanywhere (or any Cloud Based Coding Platform)." Last updated 27 April 2015. http://intenseagile.com/2015/04/27/running-jekyll-on-codeanywhere.html'}
- Right click on your old container in the file tree and select "Destroy" from the menu.
- Wait until it finishes.
- Right click on "Connections" and select "New Connection."
- Select "Container."
- Give your container a name (I would suggest "jekyll" or somthing similar).
- Search for "ruby" or scroll the list to find the Ruby stack on Ubuntu 14.04 and select it.
- Click "CREATE" and wait for it to finish.
Now you have a container that is ready to be used in testing your site locally before pushing your working changes to production on GitHub.
Install Jekyll
Since we created our new container with a Ruby stack installed, all of the dependencies for Jekyll should be installed already. The only thing we need to do is run this command in our SSH terminal:
gem install jekyll --no-ri --no-rdoc
This installs Jekyll.
Clone your repository
You want to get your website repo down to your CodeAnywhere container so you can work on it there. To start, copy the repo address by selecting the green button in your repository dashboard that says "Clone or download."
Make sure that you get the SSH link, and not the HTTPS link.
Then type the following command into your SSH terminal (while in your ~/workspace directory):
git clone [email protected]:USERNAME/USERNAME.github.io.git
This will copy your repository into a local directory so that you may work on it locally.
Create a branch
To create, or "checkout" a new branch, we can follow Roger Dudler's guide again.Dudler, Roger. “Git: The Simple Guide.” Git: The Simple Guide. Last modified 2015. http://rogerdudler.github.io/git-guide/.
Also check this resource out for help with branching and merging: Chacon, Scott, and Ben Straub. “Basic Branching and Merging.” In ProGit. New York, New York: Apress, 2014. https://git-scm.com/book/en/v2/Git-Branching-Basic-Branching-and-Merging.
git checkout -b testing
This creates a new branch and switches us into it.
If we want to see our existing branches and see where we are, category:
git branch -l or git branch --list
Once here we can make changes without disturbing the master branch, which should have our running code in it.
To switch between branches, simply type (mutatis mutandis):
git checkout BRANCH-NAME
Edit your CSS
Find your CSS file.
This file might have either .css or .scss as an extension.
Once you have found it you should make a small change to it. Change the background color, for instance.
Once that is done, you can add and commit those changes:
git add -v * && git commit -a -m "edited css to different background color
Test your branch
We are still in the testing branch.
We need to test our code to see if it worked.
To do this, we will have to access the files locally and start a webserver. Go back to the SSH terminal and check to see that the earlier script finished its work. You'll know because you will see a prompt and blinking cursor at the bottom.
Switch into the root directory of your website repository.
cd ../YOUR-GITHUB-USERNAME.github.io
And then run the following command.
jekyll serve --host=0.0.0.0 --drafts
This starts a webserver and builds your site. Then we need to find the address where you can see your site.
If you right click on the container in your file tree and select "Info" it will bring up a document with two long links in it toward the bottom. These links let you see applications that your server is running.
Click the first link, which looks like this:
http://CONTAINERNAME-LONGSTRINGOFCHARACTERS.codeanyapp.com
This will give you a 404 error.
This is because the default preview port for jekyll is 4000.
So, edit the link to read:
http://CONTAINERNAME-LONGSTRINGOFCHARACTERS.codeanyapp.com:4000
You will then be able to see your site online. If you click on the link above while I am demonstrating this in class, you will see my site.
This will allow you to see if your changes worked or not. Sometimes your changes will not be visible in the browser tab/window where you are testing your site because the browser has cached older versions of CSS and script files. To fix this, use the appropriate keybinding for your system to clear the cache. This is called a "hard refresh." It will be something like "CTRL+SHIFT+F5" but differs between operating systems/browsers.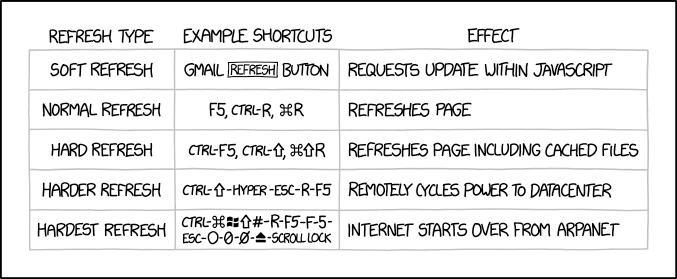
xkcd: Refresh Types https://xkcd.com/1854/
If they did, and you like them, you can merge them back into the master branch and then they will be live on your site when you push them up to GitHub.
To kill the preview, press CTRL+C in the SSH terminal where jekyll is running.
Merge your branch into master
To merge changes, switch back to the master branch.
First, checkout the master branch.
git checkout master
And make sure that you are in the right place.
git branch -l
You should see master highlighted.
Then merge the changes in:
git merge testing
And they should be made. Don't forget to commit and push.
git commit -a -m "merged testing into master"
Roll back a change
We can roll back most changes.jaw6. “How to Undo (almost) Anything with Git.” GitHub. Last modified June 8, 2015. https://github.com/blog/2019-how-to-undo-almost-anything-with-git. The simplest way to do this it to just revert the last commit.
git revert <SHA>
<SHA> above refers to the SHA-1 checksum of the git commit.
If you look at the git log for a set of recent commits you will see this:
cabox@box-codeanywhere:~/workspace/inls161.github.io$ git log
commit 98816f674673b2f6143db724edf71f34f471f164
Author: john.d.martin.iii <[email protected]>
Date:   Thu Jun 30 12:01:06 2016 -0400

    changed the color of black

commit c8cc9f57e5a0e43f38ffb7a21aacb72ded8f7778
Author: john.d.martin.iii <[email protected]>
Date:   Thu Jun 30 11:16:42 2016 -0400

    edit index

commit a2937da7d6052d953e4cbedb1c4df0a0300d7993
Author: john.d.martin.iii <[email protected]>
Date:   Thu Jun 30 11:14:40 2016 -0400
The SHA-1 checksum identifies each git commit as unique.
If we run git revert 98816f674673b2f6143db724edf71f34f471f164 -m '"Revert "changed the color of black"', which is the SHA-1 checksum of the last commit listed above, and then run git log we will see that the output tells us that we reverted the last commit:
cabox@box-codeanywhere:~/workspace/inls161.github.io$ git log
commit e73f76956fdd29c2cc0c92e6433be3669fccc155
Author: john.d.martin.iii <[email protected]>
Date:   Thu Jun 30 12:54:27 2016 -0400

    Revert "changed the color of black"

    This reverts commit 98816f674673b2f6143db724edf71f34f471f164.
In this way, we can always fix a mistake we have made (or multiple mistakes), even if we've committed and pushed them. This makes git a very powerful tool for making sure that you do not lose work.Nota bene: This is why it is a good rule of thumb to commit early and often while working on a project.
For Next Time
We're going to try a slightly different approach tomorrow. I'm going to cluster you in groups based on where you are in the process of completing assignment #2. It is okay if you are still early on: that is fine. I want to be able to collectively help you, though, and that will be easier to do if I know where you are and if you can help each other through tasks that are closer together in the overall workflow.